An introduction to visual automata-based programming in Rosmaro
![]()
To do automata-based programming is to program with states and transitions. States correspond to different behaviors. Transitions are named after events and describe how those behaviors change. The easiest way to think about this is a directed graph. Here’s an example of a cursed prince:

It may be either a Prince or a Frog. The Prince eating a pizza is an event which causes a transition from the Prince state to the Frog state.
I’m going to show you how to do (visual) automata-based programming in Rosmaro.
Rosmaro is a JavaScript library which allows you to build stateful objects.
An object is stateful when two identical method calls may produce different results.
Here’s an example:
> model.introduceYourself();
'I am The Prince of Rosmaro!'
> model.eat({dish: 'yakisoba'});
undefined
> model.introduceYourself();
'I am The Prince of Rosmaro!'
> model.eat({dish: 'pizza'});
undefined
> model.introduceYourself();
'Ribbit! Ribbit!'
Another great example of stateful objects is a Graphical User Interface. Think of an ATM. You can look twice at its screen and see different messages and fields. Your eyes are the same. The way you look at the screen hasn’t changed. It’s the state of the ATM that changed. Maybe you selected some option by clicking a button, or maybe some timer kicked in. Something caused a transition from one state to another.
Below are few examples of front-end applications built using visual automata-based programming.
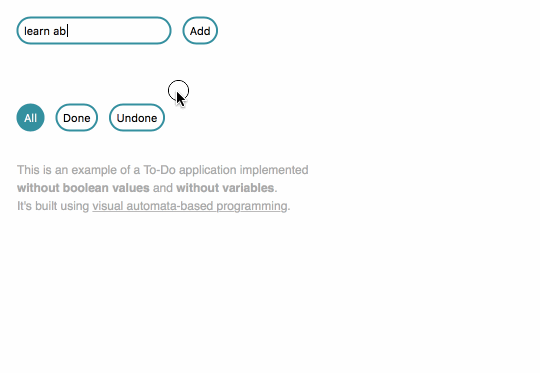
The codebase of this To-Do application consists of no boolean values.
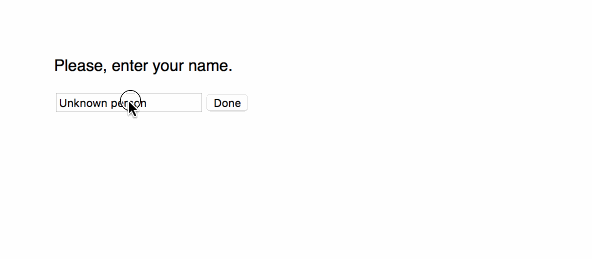
This wizard has two paths. There’s no IF for that.
The Rosmaro way of building stateful objects is to combine a drawn graph with some written code.
The graph shows all the possible behaviors and what makes them change. The fact that it’s drawn using a visual editor makes it a visual programming tool.
Each behavior is expressed as a bunch of pure functions. A function may return some result as well as a request to follow an arrow.
Rosmaro stores the whole state of a model in a pluggable storage mechanism. It may be everything from a plain-old JavaScript object to a NoSQL database. It also uses pessimistic locking to prevent going into an inconsistent state.
The example I want to show you concerns a prince who turns into a frog when he eats a pizza.
First, open the Rosmaro editor. Then, click the LOAD button to start a new project.

Add the main graph.
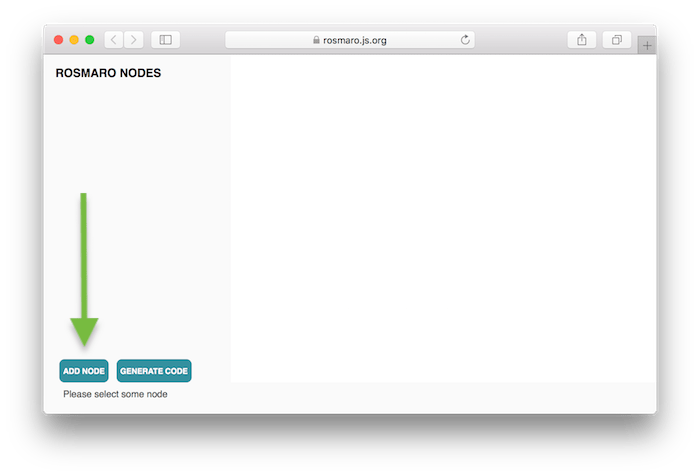

Click NEW NODE.
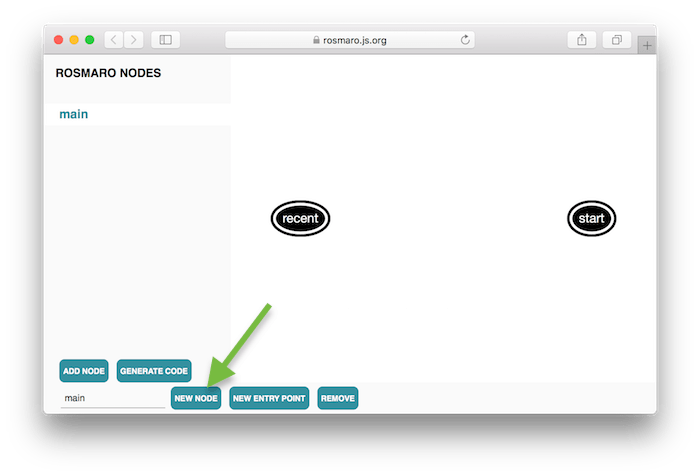
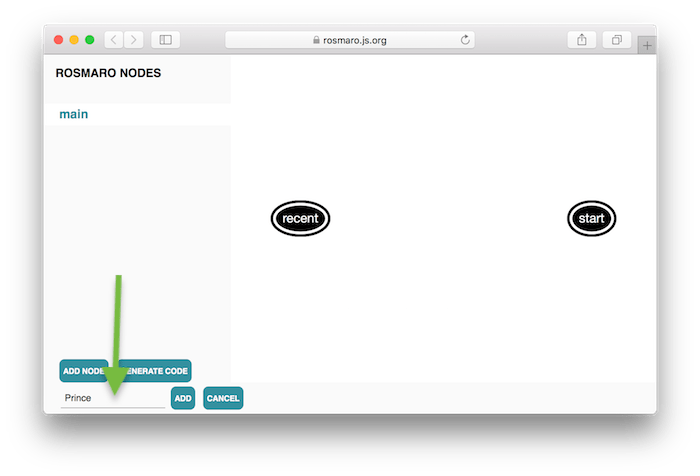
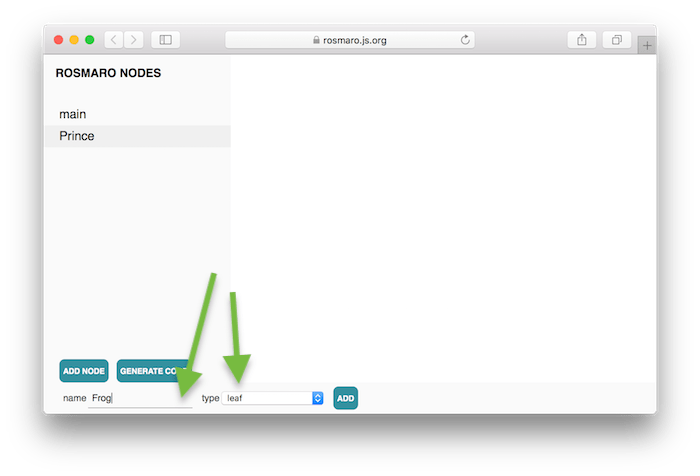
Add a local node called Prince.
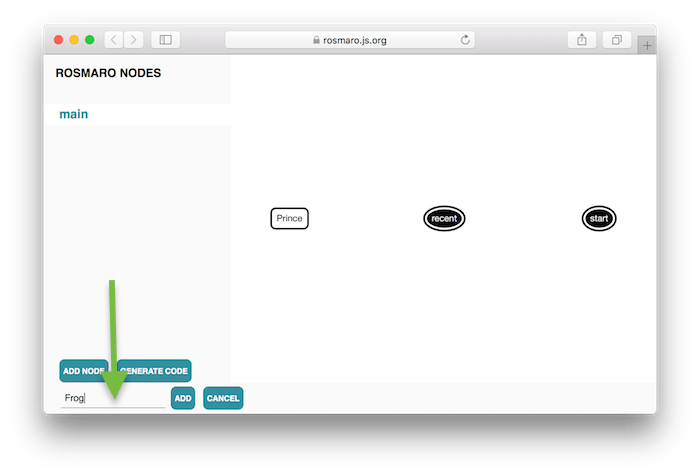
Then, add a local node called Frog.
Put your mouse cursor over the start entry point and draw an arrow to the Prince node. Then, draw an arrow from the Prince to the Frog and call it ate pizza. Finally, click ADD NODE.
![]()
![]()
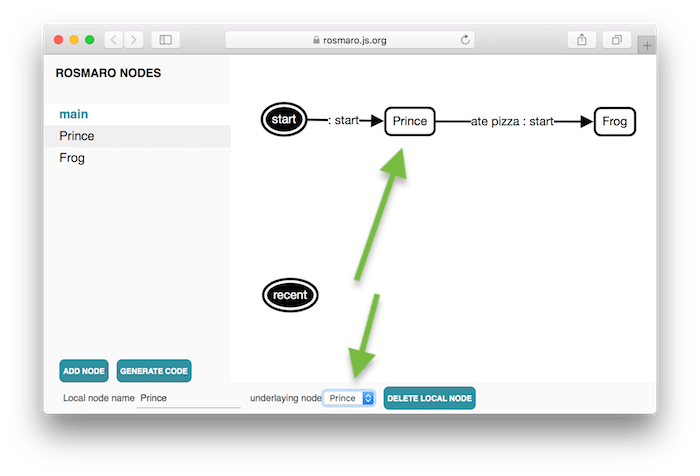
Add a leaf called Prince.
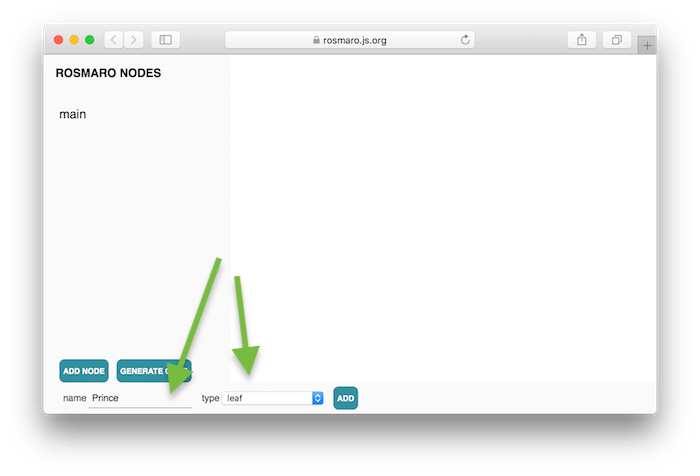
Then, add a leaf called Frog.
To complete the main graph, associate local nodes with the recently added leaves.
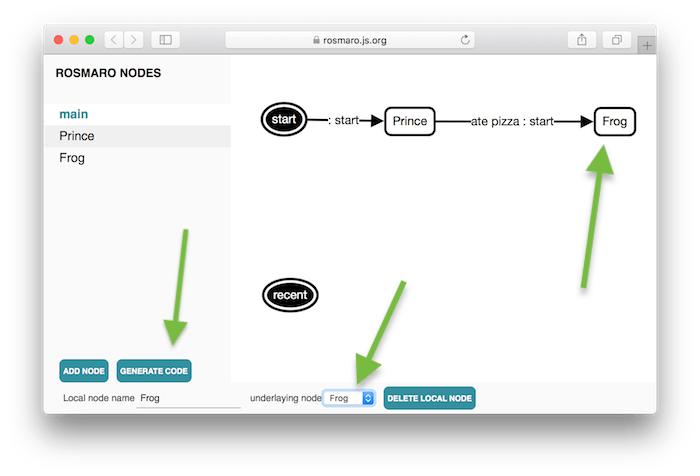
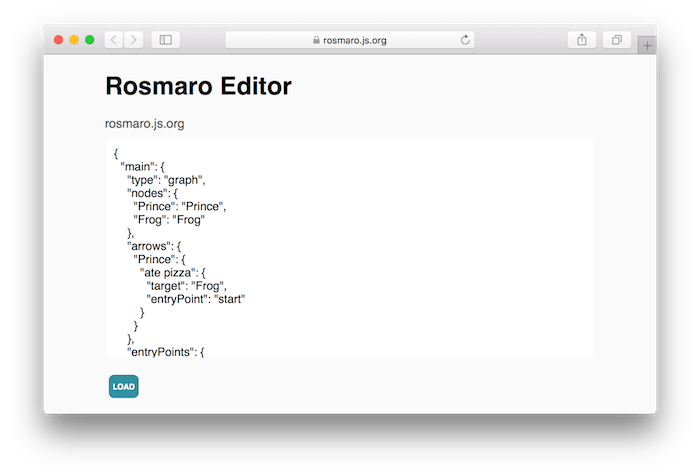
The graph is ready. Click the button called GENERATE CODE.
It’s time to write some JavaScript. First, you need to get all the dependencies.
npm i rosmaro rosmaro-in-memory-storage rosmaro-process-wide-lock --saveThen, you need to import and call them.
import makeStorage from 'rosmaro-in-memory-storage';
import makeLock from 'rosmaro-process-wide-lock';
import rosmaro from 'rosmaro';

// The model is going to be built here.

const storage = makeStorage();
const lock = makeLock();
const model = rosmaro({graph, handlers, storage, lock});

// The model is going to be used here.
The generated graph may be either imported as a JSON file, or pasted directly into the code. To keep this example as simple as possible, I suggest pasting it into the code.
const graph = {
  "main": {
    "type": "graph",
    "nodes": {
      "Prince": "Prince",
      "Frog": "Frog"
    },
    "arrows": {
      "Prince": {
        "ate pizza": {
          "target": "Frog",
          "entryPoint": "start"
        }
      }
    },
    "entryPoints": {
      "start": {
        "target": "Prince",
        "entryPoint": "start"
      }
    }
  },
  "Prince": {
    "type": "leaf"
  },
  "Frog": {
    "type": "leaf"
  }
};
A frog is certainly a simpler creature than a prince. Implementing its behavior is easy. Every time we ask the frog to introduce itself, it says “Ribbit! Ribbit!”.
const Frog = {
  introduceYourself: () => "Ribbit! Ribbit!"
};
The prince not only introduces himself, but also pays attention to the things he eats. He may eat a yakisoba and everything is fine. But as soon as he eats a pizza, he follows the arrow called ate pizza.
const Prince = {
  introduceYourself: () => "I am The Prince of Rosmaro!",
  eat: ({dish}) => {
    if (dish === 'pizza') return {arrow: 'ate pizza'};
  }
};
It’s time to put the handlers all together.
const handlers = {Frog, Prince};The model is ready. Here’s the complete code:
import makeStorage from 'rosmaro-in-memory-storage';
import makeLock from 'rosmaro-process-wide-lock';
import rosmaro from 'rosmaro';

const graph = {
  "main": {
    "type": "graph",
    "nodes": {
      "Prince": "Prince",
      "Frog": "Frog"
    },
    "arrows": {
      "Prince": {
        "ate pizza": {
          "target": "Frog",
          "entryPoint": "start"
        }
      }
    },
    "entryPoints": {
      "start": {
        "target": "Prince",
        "entryPoint": "start"
      }
    }
  },
  "Prince": {
    "type": "leaf"
  },
  "Frog": {
    "type": "leaf"
  }
};

const Frog = {
  introduceYourself: () => "Ribbit! Ribbit!"
};

const Prince = {
  introduceYourself: () => "I am The Prince of Rosmaro!",
  eat: ({dish}) => {
    if (dish === 'pizza') return {arrow: 'ate pizza'};
  }
};

const handlers = {Frog, Prince};

const storage = makeStorage();
const lock = makeLock();
const model = rosmaro({graph, handlers, storage, lock});
Identical calls to the introduceYourself method return different values. The returned value depends on events which occurred in the past. It proves that the model object is stateful.
console.log(model.introduceYourself()); // I am The Prince of Rosmaro!
console.log(model.eat({dish: 'yakisoba'})); // undefined
console.log(model.introduceYourself()); // I am The Prince of Rosmaro!
console.log(model.eat({dish: 'pizza'})); // undefined
console.log(model.introduceYourself()); // Ribbit! Ribbit!
The code of The Cursed Prince is on GitHub. It makes use of only basic Rosmaro features. When working on real apps, you’ll want to use more advanced techniques. Some of them include subgraphs, dynamic orthogonal regions, and the context object.
You can learn more about Rosmaro from its official documentation.